Getting started
This asset was made to help people with creating their surveys in Unity environments and most importantly in VR environments. Our asset offers complete transfer between Google Forms and Unity engine (see section Supported question types). Our asset generates 3D survey prefabs that can be easily customized so they can suit your survey in Unity.
This asset is made compatible with SteamVR Asset. We are using collider-raycast binding, so there should be no problem with any type of VR headsets. Our technology base was HTC Vive.
Import asset
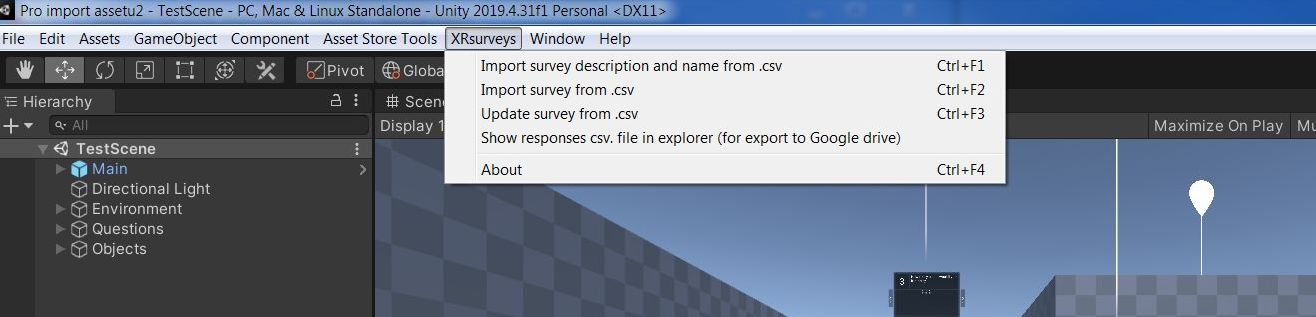
Importing the asset is no different from any other import. If you successfully import the asset, a new bar “XRsurveys“ appears at the top of the Unity window.
XRsurveys Toolbar overview
There are these items:
- “Import survey description and name from .csv”
- “Import survey from .csv”
- “Update survey from .csv”
- “Show responses csv .file in explorer (for export to Google Drive)”
- “About” - info about asset
Prepare the scene and insert the player
PC player
The scene and player preparation requires only few steps:
- Delete existing main camera.
- Insert prefab Main.prefab into the scene.
- Create some ground with a collider under the player.
- After hitting the play button and closing the menu, you can freely move with your player.
Options
- If you want to use the jumping function, assign the correct layer to your ground and set it as a layer mask in the object: Main/First Person Player - PlayerMove_Movement script.
- If you want to send the answers directly from the scene (without menu), activate the Send Answers object and place it anywhere you want.
- If you want to use virtual keyboards (for VR purposes), turn on the corresponding property on the Main/First Person Player/Main Camera - Interaction Manager script.
- Also, you can use your own players - all you need to do is to add the InteractionManager script to your camera and correctly link the components (menu, keyboards, crosshair etc.) -> it contains raycast which is needed for the interactions (you can change it, but make sure you have a proper one on your player).
Virtual reality (VR)
The scene and player preparation requires only few steps:
- Download SteamVR plugin from Unity asset store
- Restart Unity Hub
- Import the asset
- Bind your controllers in SteamVR input window
- Disable the First Person Player in Main.prefab
- Insert Player and Teleporting prefabs (SteamVR) in to the scene
- Set Player tag to Player.
- Adjust the VRInteractionManager.cs (XRsurvey) according to the instructions.
- Attach the VRInteractionManager.cs to your prefered controller (Player/SteamVRObjects/RightHand).
- Add component Line Renderer to Player/SteamVRObjects/RightHand.
- After attaching, you need to set all defined classes in the VRInteractionManager.cs inspector menu:
- Num Keyboard (Main/NumKeyboard)
- Text Keyboard (Main/TextKeyboard)
- Main Menu (Main/Menu)
- Player (Player)
- Pointer (Player/RightHand)
- Focus Material (Assets/Materials/Laser_focus)
- Normal Material (Assets/Materials/Laser)
- You can set a distance between the survey menu board and player controller through Menu.prefab by adjusting the Z position (we recommend 1.5).